Plume WIFI-6e FAQs
Get answers quickly for our most asked questions
Gearheart currently has:
- Super Pod WiFi 6
- Super Pod WiFi 6E
Setting up your Plume SuperPods is quick and easy — no tech skills required! You’ll be up and running in just a few steps.
What You’ll Need:
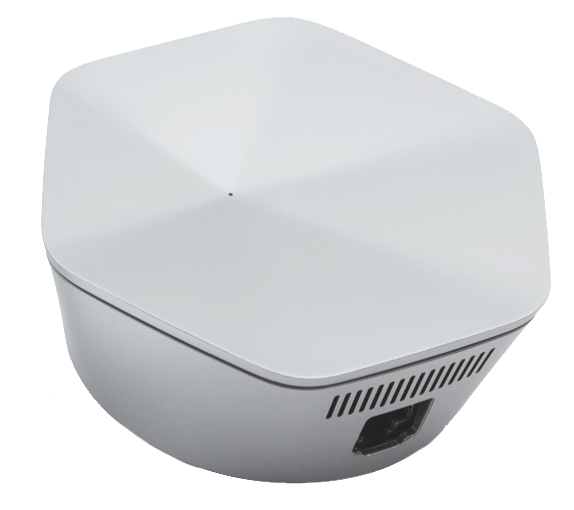
A Plume SuperPod (or a starter pack with 2–3 pods)
Your modem
A smartphone with the Plume HomePass app installed
An active internet connection
Step-by-Step Setup:
1. Download the Plume HomePass® App
Available for free on iOS and Android
Search for “Plume HomePass” in the App Store or Google Play
2. Create or Sign In to Your Plume Account
Open the app and follow the on-screen prompts to create an account
You’ll use this app to manage your whole Wi-Fi network
3. Connect Your First SuperPod
Plug your modem into power and make sure it’s online
Use the included Ethernet cable to connect the first SuperPod to your modem
Plug the SuperPod into a wall outlet near your modem
This will be your main pod — the brains of your network.
4. Follow the App to Add More Pods
The app will guide you to place and plug in additional pods around your home
Spread them out (1–2 rooms apart) for best coverage
The app will tell you if a pod is too far or too close
5. Customize Your Network
Name your network and create a Wi-Fi password
Add user profiles, parental controls, and set up guest access if needed
That’s It!
Your Plume mesh Wi-Fi network is now live! The pods will automatically adjust and optimize your Wi-Fi in the background — no need to tweak settings.
Tip:
You can use the HomePass app anytime to:
See which devices are connected
Pause internet for kids or guests
View security threats or usage
Add or move pods if needed
- Adaptive WiFi (Adapt)
- Uses AI-powered cloud algorithms to continuously optimize WiFi channels, bandwidth, and device connections. It adapts to changes in household usage and wireless interference.
- Eliminates “sticky connections,” steering devices to the best node and band for speed and reliability.
- Benefit: Consistently fast, stable Wi‑Fi throughout your home—with minimal manual effort.
- Security & Threat Protection (Guard)
- Constant, always-on threat protection from malware, phishing, ransomware, and IoT vulnerabilities.
- Uses AI-based device behavior monitoring and quarantines compromised devices automatically.
- Benefit: Comprehensive cyber defense for all connected devices—including smart home gear.
- Parental Controls & Access Management (Control)
- Create user profiles and assign devices to individuals.
- Set content filtering by age or custom rules, schedule internet freeze time per device or user.
- Manage guest Wi‑Fi: set unique credentials, expiry, and device-level permissions.
- Benefit: Granular control over who uses your Wi‑Fi, when, and what content they can access.
- Wifi Motion & Presence Awareness (Sense)
- Transforms the Wi‑Fi network into a motion sensor system using radio‑wave patterns from connected devices.
- Receive real‑time alerts for movement when you’re away, and review seven-day motion history. GPS-based auto activation and “pet mode” avoid false triggers.
- Benefit: Non‑intrusive home monitoring without cameras—for added safety and peace of mind.
- Network and App Management
- Setup and manage your network via the HomePass mobile app. Launch pods, monitor performance, control WiFi remotely.
- Temporarily prioritize bandwidth for apps, devices, or users (e.g. for gaming, streaming, video calls).
- Benefit: Intuitive, flexible network control in one streamlined app.
- Ongoing Cloud updates & Pod Warranty
- Firmware and software updates deploy automatically—typically every 3 weeks—adding new features over time.
- Your SuperPods come with a standard warranty, extended to five years with active HomePass subscription
- Benefit: Future‑proofed network experience without manual maintenance.
Feature Area | What You Get | Advantage |
Adaptive Wi‑Fi | AI-managed routing & auto optimization | Broad coverage, stable speeds |
Guard Security | Malware & intrusion protection + quarantining | Protects all smart devices |
Control Tools | Parental filters, usage scheduling, guest access | Better digital wellness & access control |
Sense Motion | Motion alerts via Wi‑Fi waves, pet/GPS modes | Home awareness without cameras |
App + Prioritization | Mobile setup/monitor, boost apps or users | Easy, smart network control |
Cloud Updates & Warranty | Continuous improvements + extended support | Keeps your system current and supported |
- Manual Reboot (Power Cycle)
- Unplug the SuperPod from the power outlet.
- Wait 30 seconds.
- Plug it back in.
- Give it 1–2 minutes to fully reconnect. The LED should return to normal (solid white or off depending on settings).
- Repeat this for each SuperPod if you have multiple units.
- Reboot Using the Plume HomePass App
- Open the HomePass app on your phone.
- Tap the ≡ menu (top left) or go to Settings.
- Tap Access Points or Pods.
- Choose the SuperPod you want to reboot.
- Tap the three dots or settings icon, then select Reboot.
- If the app doesn’t show a “Reboot” option, you’ll need to do it manually (above).
- When to Reboot
- You notice slow or unstable Wi‑Fi
- Devices won’t connect properly
- After moving a SuperPod to a new location
- Following a firmware update or power outage
- Check the LED lights on Your Superpods
Light Color | Meaning |
Solid white | Connected and online |
Blinking white | Starting up |
Blinking amber/orange | Lost internet connection |
No light | May be offline or disabled in app settings |
- Power Cycle the Network
- This fixes many temporary issues.
- Do this in order:
- Unplug your modem (if separate), wait 30 seconds, plug it back in.
- Unplug your gateway SuperPod (the one connected by Ethernet), wait 30 seconds, plug it back in.
- Wait 1–2 minutes for the light to go solid white.
- Repeat for other pods if they don’t come back online automatically.
- Use the HomePass App to Diagnose
- Open the Plume HomePass app.
- Tap ≡ menu > Access Points or Pods.
- Look for:
- Any offline pods
- Alerts like “No internet connection”
- Tap any pod to restart, view status, or troubleshoot.
- Check Network Cables and Connections
- Make sure the Ethernet cable is securely connected from your modem to the gateway SuperPod.
- Use another cable to rule out damage.
- Check Your Modem and ISP
- If your modem isn’t providing internet (e.g., no lights or “online” light is off), contact your ISP or test another device directly plugged into the modem
- Factory Reset (Last Resort)
- If nothing else works, you can reset your SuperPods:
- Hold the reset pinhole button for 10–15 seconds until the light flashes.
- Re-set up the pod in the HomePass app.
- Only do this if the pod can’t reconnect at all.
- Open the Plume HomePass App
- Available for iOS and Android.
- Tap the ≡ Menu (top left corner)
- Go to “Access” or “Wi-Fi Settings”
- This is where your primary network and guest network settings live.
- Tap Your Primary Network
- You’ll see:
- Wi-Fi name (SSID)
- Wi-Fi password
- Tap to Edit the Name or Password
- Enter your new network name and/or new password.
- Tap “Save” or “Done” when finished.
- You’ll see:
- What Happens Next?
- Your network will briefly restart.
- All connected devices will be disconnected and need to reconnect using the new name/password.
- You’ll also need to update the Wi-Fi info on any smart devices (like printers, doorbells, etc.).
- Tips:
- Use a unique network name so you can identify it easily.
- Make your password strong but memorable (12+ characters, mix of letters, numbers, symbols).
Yes — Plume offers a mobile app called Plume Home (formerly HomePass) that lets you set up, monitor, and manage your entire Plume network. It’s available for both iOS and Android.
Choosing Plume means you’re getting more than just a mesh Wi‑Fi system—you’re getting a cloud-powered smart home platform designed to adapt, secure, and simplify your entire connected experience.
- Here’s why Plume may be the right choice for you:
- Truly Adaptive Wi‑Fi
- Plume’s AI-powered cloud constantly learns how your devices use bandwidth and optimizes performance in real time.
- Unlike basic mesh systems, Plume adapts dynamically to:
- Streaming habits
- Device locations
- Network congestion
- Result: Consistently strong, reliable Wi‑Fi—even as your home and devices change.
- Whole-Home Cybersecurity
- Includes always-on threat protection for every device in your home.
- Defends against:
- Malware
- Phishing
- Botnets
- IoT vulnerabilities
- No extra hardware or apps needed—security is built into your network.
- Smart Parental Controls & Device Management
- Create profiles for family members and devices.
- Set content filters, bedtimes, pause schedules, and more.
- View individual usage insights and block or prioritize devices.
- Motion Detection Without Cameras
- Unique to Plume: Wi‑Fi Motion Detection (Plume Sense).
- Uses Wi‑Fi signals to detect movement in your home—no cameras, no invasion of privacy.
- Great for monitoring elderly family members or detecting motion while you’re away.
- Guest Wi‑Fi with Full Control
- Create a guest network with custom passwords, expiration times, and device limits.
- See exactly what devices are using your guest network and for how long.
- Elegant Hardware & Scalable Coverage
- SuperPods plug directly into wall outlets—no bulky boxes or messy cords.
- Easily scalable: add more pods to expand coverage as your space grows.
- App-Based Control with HomePass
- The Plume HomePass app puts total control in your hands.
- Change Wi‑Fi settings, view motion history, manage devices, and more—all from your phone.
- Automatic Updates & Future-Proofing
- Plume updates its software every few weeks, adding new features and security improvements.
- No manual intervention needed—you always have the latest tools.
- Best For:
- Families that want control + security + motion awareness.
- Smart homes with lots of connected devices.
- Users looking for hands-off performance optimization.
- People who want a privacy-focused alternative to cameras.
- Truly Adaptive Wi‑Fi
Plume works with nearly all Wi‑Fi-enabled devices and is designed to support a wide range of home tech—just like a traditional router, but with smarter cloud-based features. Here’s a detailed look at what devices are compatible with Plume:
- General Device Compatibility
- Plume supports any device that connects to Wi‑Fi, including:
- Smartphones & Tablets
- iPhones, iPads (iOS 13+ recommended for HomePass app)
- Android phones and tablets (Android 7.0+)
- Computers & Laptops
- Windows PCs
- macOS and MacBooks
- Chromebooks
- Smart TVs & Streaming Devices
- Roku, Apple TV, Amazon Fire TV, Chromecast
- Smart TVs from Samsung, LG, Sony, TCL, etc.
- Gaming Consoles
- Xbox Series X/S, Xbox One
- PlayStation 5, PS4
- Nintendo Switch
- Smart Home & IoT Devices
- Amazon Alexa
- Google Nest Hub & Assistant
- Ring, Arlo, Blink, SimpliSafe, Ecobee, Nest, Hue lights, smart plugs, etc.
- Printers & Network Devices
- Wireless printers (HP, Canon, Epson, etc.)
- File servers and storage devices (NAS)
- IP cameras, baby monitors
- Network & Wi‑Fi Standards Supported
- Plume is compatible with:
- Wi‑Fi 4 (802.11n)
- Wi‑Fi 5 (802.11ac)
- Wi‑Fi 6 (on some newer SuperPods)
- Ethernet connections via SuperPod Ethernet ports
- You don’t need to upgrade your devices—Plume is backward-compatible with older tech.
- Ethernet-Compatible Devices
- Each SuperPod has 2 Ethernet ports, so you can hardwire devices like:
- Desktop computers
- Game consoles
- Smart TVs
- Network switches
- VoIP phones or hubs
- Smartphones & Tablets
- Plume supports any device that connects to Wi‑Fi, including:
- General Device Compatibility
Plume SuperPod Model | Wi‑Fi Standard | Max Theoretical Wireless Speed | Ethernet Ports | Best For |
Plume SuperPod (Original) | o Wi‑Fi 5 (802.11ac) | o Up to 1 Gbps | o 2 x Gigabit Ethernet | o Most homes with gigabit internet |
Plume SuperPod Wi‑Fi 6 | o Wi‑Fi 6 (802.11ax) | o Up to 2.4 Gbps | o 2 x Gigabit Ethernet | o Homes with Wi‑Fi 6 devices, faster internet plans |
- Ethernet Speeds
- Each SuperPod has two Gigabit Ethernet ports for wired connections.
- Supports wired backhaul to improve overall network performance.
- Real-World Performance
- Designed to support typical home internet plans from 100 Mbps up to 1 Gbps smoothly.
- With Wi‑Fi 6 SuperPods, better handling of multiple devices and higher throughput is possible.
- Additional Notes
- Plume uses cloud-based AI optimization to dynamically manage bandwidth and device connections, often improving speeds in busy or congested environments.
- Adding more SuperPods can improve coverage and speed distribution across your home.
- For multi-gig internet plans (above 1 Gbps), Plume currently relies on multiple SuperPods and wired connections but doesn’t officially support multi-gig Ethernet ports like some newer mesh systems.
LED Color | Status / Meaning |
Solid White | SuperPod is powered on and fully connected to the network |
Pulsing White | SuperPod is booting up or updating software |
Solid Blue | SuperPod is in setup mode, ready to be added to your network |
Flashing Blue | SuperPod is actively connecting to the cloud or network |
Yellow/Amber | SuperPod has limited connectivity or can’t reach the internet |
Flashing Yellow | SuperPod is having trouble connecting to the primary node or gateway |
Red | Critical error or SuperPod is offline |
No Light | SuperPod is powered off or not getting power |
Additional Tips:
Most of the time, your SuperPod will show solid white when working normally
If you see yellow or red, try rebooting the SuperPod or checking your internet connection.
The LED is typically on the front or side of the SuperPod.
If you get an error saying your Plume SuperPod is already registered, it means the device is linked to another Plume account or wasn’t properly reset. Here’s what to do:
- Check for Existing Account Access
- Verify if you or someone in your household set up the Plume network before.
- If yes, try logging in with that account to manage the SuperPods.
- Factory Reset the SuperPod
- esetting clears any previous account info linked to the device.
- How to reset a Plume SuperPod:
- Locate the reset button (usually a small hole) on the SuperPod.
- Use a paperclip or pin to press and hold the reset button for about 10 seconds.
- Release the button when the LED starts flashing, indicating reset.
- Wait for the SuperPod to reboot and show the initial setup LED status.
- Remove SuperPod From Previous Account
- If you have access to the old Plume account, log in and remove the SuperPod from that network.
- This frees it up to be added to a new account.
- Contact Plume Support
- If you don’t have access to the old account or can’t reset the device, contact Plume customer support.
- Be ready to provide:
- The device’s serial number (on the bottom or back)
- Proof of purchase
- Check for Existing Account Access
- Identify Your SuperPod
- Check the serial number on your SuperPod (usually on the bottom or back).
- The Plume app often shows the serial or device ID—match it to the device you want to set up.
- Factory Reset Unwanted SuperPods
- If there are leftover or other SuperPods showing up, reset the ones you’re not using:
- Find the reset button (small hole) on the SuperPod.
- Use a pin to press and hold the reset button for about 10 seconds until the LED flashes.
- Release and wait for reboot.
- Set Up in a Controlled Environment
- If neighbors or other Plume devices are nearby, they might appear.
- Try setting up your SuperPod away from other Plume networks or in a different room.
- Check Your Device’s Bluetooth
- Plume uses Bluetooth to detect SuperPods during setup.
- Ensure Bluetooth is enabled on your phone or tablet.
- Restart Setup Process
- Close and reopen the Plume app.
- Power cycle the SuperPod you want to set up (unplug and plug it back in).
- Retry discovery.
- Identify Your SuperPod
- Ensure SuperPod is Powered On
- Confirm your Plume SuperPod is plugged in and powered on.
- The LED should be on or pulsing, indicating it’s active.
- Enable Bluetooth on Your Phone
- Plume setup relies on Bluetooth to detect devices.
- Make sure Bluetooth is enabled on your phone or tablet.
- Move Closer to the SuperPod
- Bring your phone/tablet within a few feet of the SuperPod during setup to ensure Bluetooth connectivity.
- Restart Devices
- Power cycle your SuperPod (unplug and plug back in).
- Restart your phone or tablet.
- Relaunch the Plume app and try again.
- Update the Plume App
- Make sure you’re running the latest version of the Plume app.
- Reduce Interference
- Move the SuperPod away from other electronics that might cause wireless interference.
- Try a Different Device
- Attempt setup with another phone or tablet if possible.
- Ensure SuperPod is Powered On
- Unbox and Plug in the First SuperPod (Gateway Pod)
- Plug one SuperPod into a power outlet near your modem or modem/router.
- Use the Ethernet cable to connect it to your modem’s LAN port.
- The SuperPod’s LED will blink as it powers up—wait for it to pulse steadily.
- Download the Plume App (HomePass)
- Go to the App Store (iOS) or Google Play Store (Android).
- Search for and install “Plume HomePass”.
- Create or Log In to Your Plume Account
- Open the app and sign up or log in.
- You may receive a verification email—click the link to proceed.
- Begin Setup in the App
- The app will guide you to:
- Allow Bluetooth and location (needed to detect SuperPods)
- Automatically detect the first (gateway) SuperPod
- Name your network (SSID) and set a strong Wi‑Fi password
- Add More SuperPods
- Plug additional SuperPods into outlets around your home.
- Use the app to add them one at a time:
- Make sure they’re within range of another SuperPod
- Wait for the LED to show it’s ready, then tap “Add Pod” in the app
- Complete Setup
- The app will test your network and show you connected devices.
- You’ll have access to:
- Parental controls
- Device management
- Motion awareness (if supported)
- Security features
- Unbox and Plug in the First SuperPod (Gateway Pod)
Placement Tip | Why It Helps |
Place SuperPods out in the open | Avoids signal blockage |
Avoid plugging behind furniture | Prevents interference |
Keep Pods ~2 rooms apart | Maintains mesh performance |
- Option 1: Soft Reset (Keeps SuperPod Linked to Your Account)
- Use this if you’re troubleshooting but plan to keep using the SuperPod on the same network.
- How to Soft Reset:
- Find the reset button (small pinhole on the side or bottom).
- Use a paperclip or similar tool to press and hold the reset button for about 4 seconds.
- Release when the LED starts blinking slowly.
- The SuperPod will restart and reconnect to your existing network.
- Option 2: Factory Reset (Full Reset)
- Use this if you’re removing the device from your network, giving it away, or starting from scratch.
- How to Factory Reset:
- Press and hold the reset button for at least 10 seconds (up to 30 seconds, depending on model).
- Release when the LED begins rapidly blinking or turns off and then restarts.
- The device will reset completely and return to setup mode.
- Important: A factory reset removes the SuperPod from your account and network. You’ll need to re-add it in the Plume (HomePass) app.
- After Reset:
- Open the Plume HomePass app
- Tap “Add a Pod” to reconfigure the SuperPod if you’re setting it up again
- Step 1: Download the Plume App (HomePass)
- iPhone/iPad: Open the App Store, search for “Plume HomePass”
- Android: Open the Google Play Store, search for “Plume HomePass”
- Look for the app named “HomePass by Plume®”
- Step 2: Create or Log Into Your Plume Account
- Open the app and tap “Sign Up” or “Log In”
- Enter your email address.
- You’ll receive a verification email — open it and tap the link to continue.
- Return to the app, which will auto-verify and take you to setup.
- Step 3: Plug In and Set Up Your First SuperPod
- Plug your first SuperPod (gateway pod) into a power outlet near your modem or modem/router combo.
- Use the Ethernet cable to connect the SuperPod to your modem.
- Wait for the LED to pulse or blink — this means it’s ready to be found.
- Step 4: Set Up Wi‑Fi in the App
- The app will search for the SuperPod using Bluetooth and location (allow access when prompted).
- Once found, follow prompts to:
- Name your Wi‑Fi network (SSID)
- Set a secure password
- Choose your home layout and room names (optional)
- Step 5: Add Additional SuperPods
- Plug each extra SuperPod into an outlet in other rooms (2–3 rooms apart is ideal).
- Tap “Add Pod” in the app and follow the instructions.
- Wait for the app to confirm successful connection.
- You’re All Set!
- You can now use the HomePass app to:
- Monitor connected devices
- Set up parental controls
- Create guest networks
- View security and motion insights
- Step 1: Download the Plume HomePass App
- For iOS: Visit the App Store and search for “Plume HomePass.”
- For Android: Go to Google Play Store and search for “Plume HomePass.”
- Ensure your device runs iOS 15.0 or newer, or Android 7.0 or newer. Plume V2
- Step 2: Create or Log In to Your Plume Account
- Open the Plume HomePass app.
- Select “Set Up Plume”.
- Enter your name and email address.
- Check your email for a verification link and follow the instructions to verify your account. Plume V2+1Plume V2+1
- Step 3: Connect Your First SuperPod
- Unplug any existing router from your modem.
- Connect a SuperPod to your modem using an Ethernet cable.
- Plug the SuperPod into a power outlet.
- The LED on the SuperPod will pulse white when it’s ready.
- In the app, follow the prompts to complete the setup.summit-broadband.com
- Step 4: Add Additional SuperPods
- Plug additional SuperPods into power outlets in different rooms.
- In the app, tap “Add Pod” and follow the instructions to add each SuperPod.
- Position SuperPods approximately 2–3 rooms apart for optimal coverage.
- Step 5: Customize Your Wi-Fi Network
- Choose a Wi-Fi name (SSID) and set a secure password.
- If you prefer, you can use your existing Wi-Fi name and password to make the transition seamless for your devices.
- Turn off your old Wi-Fi network to prevent devices from connecting to it. Plume V2
- Additional Resources
- Plume Setup Guide: Visit Plume’s official setup page for detailed instructions and troubleshooting tips.
- Customer Support: If you encounter issues, contact Plume Support through the app or visit their support center.
.
Ready to Get Connected?
It’s easy, just click the button bellow and use our online order section. Add the services you want, fill in your info, and you are ready to go!